Living with constant hip pain can interrupt your daily routine, making simple tasks like walking or climbing stairs more difficult. It impacts how you move and experience life. If resting and physical therapy stop providing relief, your doctor may suggest a hip arthroscopy. This procedure is minimally invasive; it allows doctors to view and repair joint damage through tiny incisions. Here’s information to help with navigating the hip arthroscopy process:
Understanding the Surgical Procedure
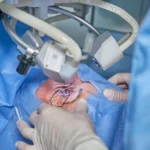
A hip arthroscopy uses advanced technology to treat joint problems without major surgery. When you arrive at the clinic, the medical team gives you anesthesia to make sure you remain comfortable and asleep. The surgeon then makes a few small incisions around your hip joint. Through these tiny openings, the doctor inserts a thin tube equipped with a microscopic camera, called an arthroscope. This camera sends real-time video to a monitor, and it gives the surgeon a clear, magnified view of the joint. Doctors may utilize this method to remove loose cartilage or fix a torn labrum.
Using specialized miniature instruments, the surgeon carefully addresses the damaged tissue. This targeted approach helps preserve healthy tissue and surrounding muscle structures. Because the incisions are small, the procedure typically results in less tissue disruption compared to traditional open surgery.
Preparing for the Surgery Day
Proper preparation supports a smooth and efficient recovery at home. Organizing your living space in advance helps minimize disruptions after the hip procedure. You may also require crutches or a walker during the initial recovery period. Clear hallways and remove potential tripping hazards, such as loose rugs or electrical cords. Arrange a comfortable recovery area on the main floor; this helps limit the need for stairs. Keep key items, including your phone, prescribed medications, and remote controls, within easy reach.
Tips to help make sure your body is prepared for surgery include:
- Adhere to your surgeon’s fasting instructions, which may include no food or drink after midnight.
- Discontinue certain medications, such as blood thinners, according to your physician’s directions.
- Arrange for a responsible adult to provide transportation home, as anesthesia may affect coordination and reaction time.
Managing the Recovery Phase
Most patients return home the same day as the procedure, but the joint requires approximately six weeks to fully recover. Movement plays a key role in restoring your strength and flexibility safely. Your doctor may prescribe a targeted physical therapy program tailored directly to your structural needs. A trained therapist teaches you specific movements to stabilize your hip joint and build supporting muscles. Attend all your scheduled therapy sessions, and practice your assigned home exercises as directed to keep your recovery on track. You can help protect your hip joint by doing the following:
- Use your crutches to limit weight on the repaired hip until your doctor clears you for normal walking.
- Take your prescribed pain medications on a consistent schedule to stay ahead of the soreness.
- Avoid strenuous activities, heavy lifting, or deep bending movements that strain the healing tissues.
Learn More About Hip Arthroscopy
Navigating a hip arthroscopy involves understanding the medical procedure, preparing your home, and actively participating in your rehabilitation. By organizing your physical space and following your pre-surgery instructions, you can set yourself up for long-term success. Your doctor will also tell you when you’re able to return to work; this often depends on whether your job responsibilities require you to put pressure on your hip. Contact an orthopedic specialist today to discuss this procedure and build a customized recovery plan.